2-Ingredient Peanut Butter Fudge Creamy and Easy Recipe
Sometimes you want a sweet treat without fussing over loads of ingredients or complicated steps. That’s where 2-Ingredient Peanut Butter Fudge comes in—it’s practically magic in the kitchen. You get that classic creamy fudge texture, irresistible peanut butter flavor, and a dessert that comes together in a snap. Homemade fudge doesn’t get more approachable (or more snack-able) than this.
Whether you’re a newbie or an expert baker, there’s something so satisfying about seeing that smooth peanut buttery mixture go from bowl to fridge and, before you know it, bite-sized squares ready to eat. Let’s dig into what makes this simple fudge a game changer for your dessert rotation.
Creamy Delight: Why This 2-Ingredient Peanut Butter Fudge Works
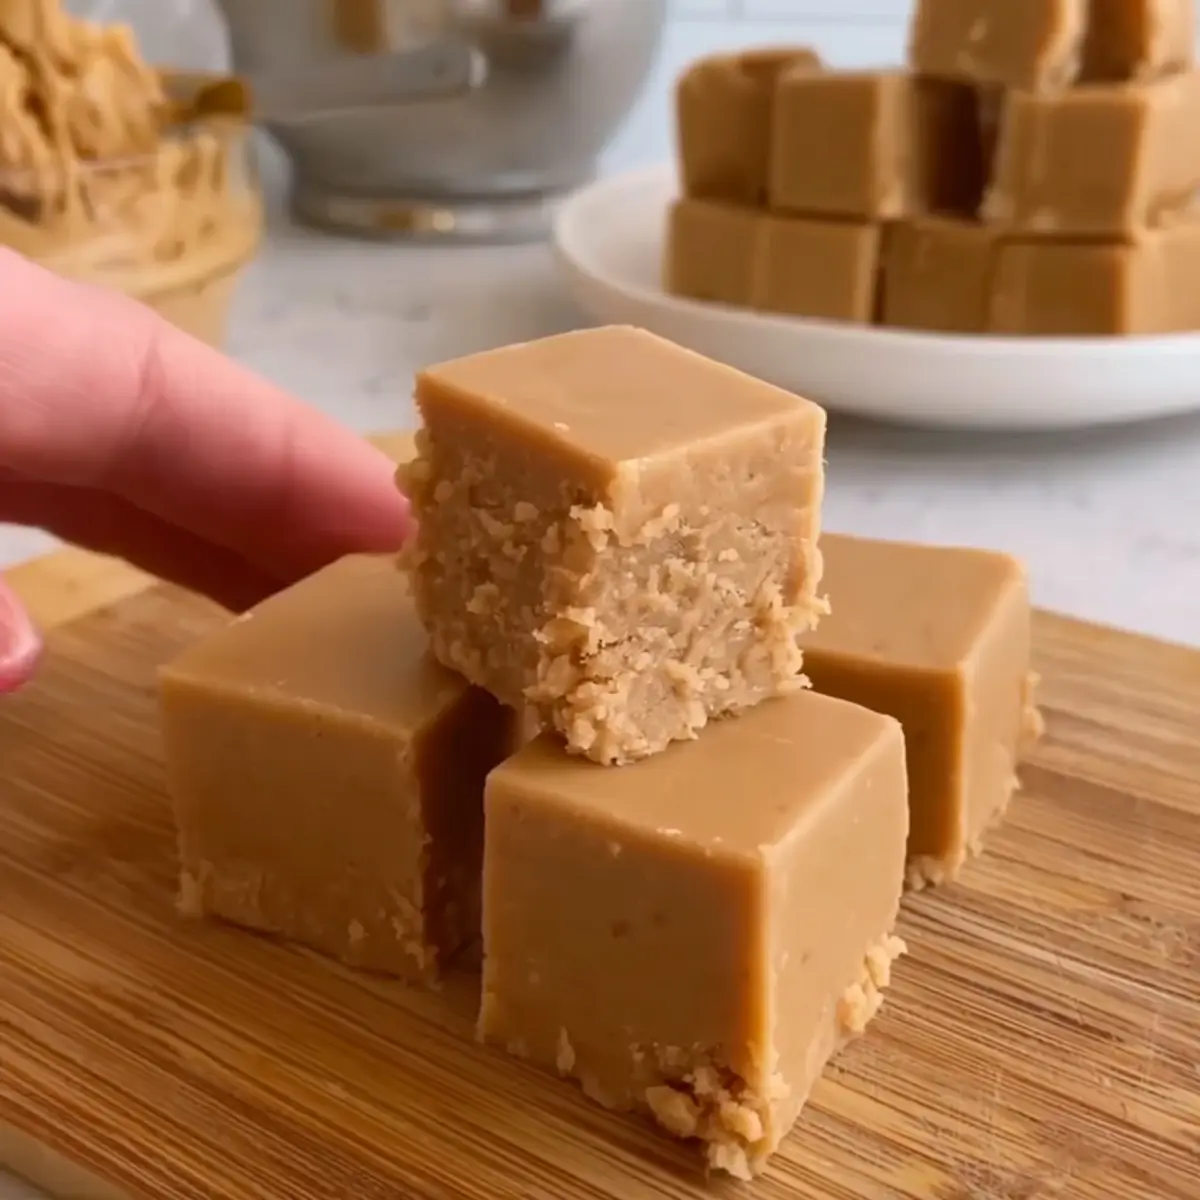
When you’re craving the nostalgia of classic fudge but want a shortcut that doesn’t skimp on taste, this 2-Ingredient Peanut Butter Fudge delivers every single time. It’s as fuss-free as a dessert gets, yet it never fails to win over friends and family. The peanut butter brings that rich, nutty depth, while the frosting provides all the sweetness and structure the fudge needs.It’s the combination of creamy texture, perfect sweetness, and utter simplicity that makes this fudge so special. No stove, no candy thermometer—just pure peanut butter bliss in every bite. Ideal for last-minute parties, after-school snacks, or anytime the sweet tooth strikes.
Peanut Butter Fudge Ingredient Notes
Just two pantry staples make up this chewy, melt-in-your-mouth treat! Here’s what you’ll need to whip up 2-Ingredient Peanut Butter Fudge:- Vanilla frosting – This gives the fudge its structure and the signature sweet, smooth base. Choose your favorite brand for best results—creamy, not whipped, works best.
- Peanut butter – Brings the classic nutty flavor and creamy texture. A standard, shelf-stable peanut butter works well here; skip natural PB for the firmest fudge.
Die vollständige Zutatenliste mit Mengenangaben findest du unten in der Rezeptkarte.
How to Make 2-Ingredient Peanut Butter Fudge: Step by Step
Get out a mixing bowl and an 8-inch square pan lined with foil—this easy fudge is ready in just a handful of steps.- Combine: Scoop the entire tub of vanilla frosting and the full jar of peanut butter into a mixing bowl. The scents blend together instantly—sweet and nutty, signaling something good is coming.
- Mix: Use a spatula to stir until the mixture becomes silky smooth. You’ll notice it thickens as you mix, showing that luscious fudge consistency coming together.
- Set: Pour the mixture into your foil-lined pan. Smooth out the top with your spatula—the glossy surface should look even and inviting.
- Chill: Slide the pan into the fridge. Once chilled, the fudge will firm up, becoming delightfully dense yet creamy to the touch.
- Serve: Lift the fudge from the pan using the foil. Slice into small squares—the knife should glide through, revealing a soft but set interior ready to enjoy.
Fudge Success: Tips, Texture Cues & Common Mistakes
Achieving that classic fudge texture is all about balance and a little patience. Here’s how to get the best out of your 2-Ingredient Peanut Butter Fudge:- Use creamy (not whipped or natural) peanut butter for the smoothest, most stable result.
- Mix thoroughly until the base is uniform with no visible streaks of frosting or peanut butter.
- Line your pan with foil for easy lift-out and clean edges when slicing.
- Let the fudge fully chill—this helps set the structure so the squares hold their shape and have a rich, fudgy bite.
- If your fudge feels too soft or sticky, give it extra time in the fridge to firm up.
- If it looks greasy, gently blot the top with a paper towel before cutting.
Easy Variations, Tasty Pairings & Serving Ideas
The beauty of this fudge is how adaptable it is! You can make it your own in so many ways:- Top with mini chocolate chips, chopped nuts, or a sprinkle of flaky sea salt before chilling for extra texture and flavor.
- Swirl in a bit of cocoa powder for a chocolate-peanut butter twist.
- Use it as a rich layer in ice cream sundaes or sandwich a square between cookies.
- Pair with hot coffee or a cold glass of milk for a classic treat.
- Gift it in a pretty box lined with parchment paper—it travels and keeps especially well!
Storing and Serving 2-Ingredient Peanut Butter Fudge
Your fudge will keep best when stored airtight in the refrigerator. The cool environment keeps it set and sliceable for days. For longer storage, you can freeze blocks or individual squares—just wrap with foil and pop into a freezer-safe bag.Let refrigerated or frozen pieces sit at room temperature for a few minutes before serving for the creamiest texture. Stack squares with parchment between layers to avoid sticking. This makes them easy to grab for impromptu celebrations or a late-night snack.
FAQs about 2-Ingredient Peanut Butter Fudge
Can I use natural peanut butter in 2-Ingredient Peanut Butter Fudge?
Traditional, shelf-stable peanut butter works best for this recipe. Natural peanut butter may result in fudge that is too soft and oily, since it doesn’t set as firmly. If you decide to try natural PB, expect a softer texture.
How long does this fudge last in the fridge?
This fudge can last for up to a week when stored in an airtight container in the refrigerator. Its texture stays creamy and easy to slice when kept cold. If storing longer, consider freezing portions.
Can you freeze 2-Ingredient Peanut Butter Fudge?
Yes, this fudge freezes beautifully. Wrap the fudge tightly in foil and place it in a freezer-safe container or bag to prevent freezer burn. Thaw in the fridge or at room temperature before serving for the best texture.
Why is my fudge soft or sticky instead of firm?
Usually, the fudge just needs more chill time in the fridge. Warm kitchens or softening during mixing may cause fudge to be softer—give it extra time to firm up, and always store it chilled.
Homemade Fudge: Simplicity in Every Bite
With just a bowl and two ingredients, you can have homemade fudge with legit old-fashioned flavor and a melt-in-your-mouth bite. This 2-Ingredient Peanut Butter Fudge is proof that delicious things don’t have to be complicated or time-consuming.Next time the craving for something creamy, nutty, and sweet strikes, you know exactly what to make. Each square is a little moment of comfort—a perfect treat for sharing, gifting, or keeping all to yourself.
What To Try Next
If you loved this simple peanut butter fudge, these treats complement your sweet cravings perfectly.
- No Bake Pineapple Cream Dessert — another easy no-bake dessert that’s creamy and refreshing.
- No Bake Star Crunch Cookies — shares the no-cook convenience with playful textures.
- Mini Windbeutel Dessert — a light and airy sweet to contrast the dense fudge texture.
Empfohlene Ausrüstung


KitchenAid 5KSMMGA All-Metal Food Grinder Attachment
Useful for finely mixing or grinding nuts for peanut butter
Bei Amazon ansehen* Als Amazon-Partner verdiene ich an qualifizierten Käufen. Für dich entstehen keine Mehrkosten.

2-Ingredient Peanut Butter Fudge
Ingredients
Equipment
Method
- Combine: In a mixing bowl, pour in the entire tub of vanilla frosting and the entire jar of peanut butter.
- Mix: Use a spatula to stir the two ingredients together until they are well combined and smooth.
- Set: Pour the mixture into a pan lined with aluminum foil.
- Chill: Place the pan in the refrigerator and allow it to chill until the fudge has set.
- Serve: Once firm, remove from the pan, slice into small squares, and enjoy.